
Why Porcelain Tiles Deserve Proper Installation

Porcelain tiles are a popular choice for UK homes, offering a stylish and practical flooring solution. But selecting beautiful porcelain tiles, like those available from Hyperion Tiles, is just the first step. The true secret to maximising their beauty and lifespan lies in the installation process. Understanding the distinct properties of porcelain and using the correct installation techniques is essential.
Durability and Water Resistance: Key Advantages
Porcelain's inherent strength makes it perfect for busy areas. Its dense structure and low porosity make it much tougher and less absorbent than standard ceramic tiles. This results in a surface that's highly resistant to scratches, chips, and stains, keeping it looking new for years.
This low porosity also means porcelain offers excellent water resistance, making it perfect for bathrooms and kitchens. Proper installation enhances this, preventing water from seeping underneath and damaging the subfloor.
The Importance of Proper Installation in the UK Market
Correctly installed porcelain is especially vital in the UK's damp climate, as it helps prevent mould and mildew growth in humid areas. This is a key consideration for homeowners.
With the UK's thriving construction industry, the demand for high-quality porcelain tile installation continues to increase. Porcelain holds a significant portion of the UK ceramic tile market, which is expected to see a CAGR of 2.77% between 2023 and 2033. It's projected to reach a value of USD 1.42 billion by 2033. This growth highlights the need for skilled and knowledgeable installers who can guarantee long-lasting performance. Find more detailed statistics here
Choosing the Right Porcelain Tile for Your Project
Choosing the right porcelain tile is as crucial as the installation itself. Consider the specific requirements of the area. A busy hallway might require durable, textured porcelain, while a wet room demands slip-resistant options.
Aesthetics are also important. Porcelain comes in a wide variety of colours, sizes, and finishes to complement any design. Selecting a tile that aligns with your overall design vision is key to a successful project. This careful planning ensures your porcelain tiles not only perform well but also enhance the look of your UK home or business.
Your Complete Tool Arsenal for Porcelain Success
Successfully installing porcelain tiles requires the right tools and materials. This guide provides the knowledge you need to achieve a professional finish, covering everything from the essential tile cutter to the specific adhesive required for porcelain.
Essential Tools: A Breakdown
The correct tools are essential for a smooth installation. Let's explore the key items in your porcelain tile toolkit.
-
Tile Cutter: A manual tile cutter is perfect for straight cuts. Investing in a quality cutter ensures cleaner breaks, especially with larger format porcelain tiles.
-
Wet Saw: A wet saw with a diamond blade is vital for intricate cuts like notches and curves. The water cools the blade, minimizes dust, and creates precise cuts. While renting is possible, buying a quality wet saw is a good investment for larger or frequent projects.
-
Notched Trowel: A notched trowel spreads adhesive and creates ridges for proper coverage and air escape, ensuring a strong bond. Notch size depends on tile size – larger tiles need larger notches.
-
Level: A level ensures a flat surface to prevent lippage (uneven tile edges). Use a long level for larger areas and a smaller one for individual tiles.
-
Rubber Mallet: Gently tapping tiles into the adhesive with a rubber mallet ensures a strong bond without cracking the porcelain.
-
Spacers: Tile spacers create consistent grout lines and come in various sizes. Remember to remove them before grouting.
-
Grout Float: A grout float spreads grout evenly and fills joints completely.
Before we discuss materials, let's review the essential tools in a handy table:
Introducing the "Essential Tools for Porcelain Tile Installation" table, a quick reference guide outlining the purpose and cost of each tool. This table will assist in budgeting and planning your project.
| Tool | Purpose | Approximate Cost (£) | Rent or Buy |
|---|---|---|---|
| Tile Cutter | Straight cuts | 20-100 | Buy |
| Wet Saw | Intricate cuts | 100-500+ | Rent or Buy |
| Notched Trowel | Spreading adhesive | 5-20 | Buy |
| Level | Ensuring level surface | 10-50 | Buy |
| Rubber Mallet | Setting tiles | 5-15 | Buy |
| Spacers | Consistent grout lines | 2-5 | Buy |
| Grout Float | Spreading grout | 5-15 | Buy |
This table provides a general cost range. Prices may vary based on brand and quality. Renting specialized tools like wet saws can be cost-effective for smaller projects.
Materials Matter: Choosing the Right Products
The right materials, particularly adhesive and underlayment, are just as crucial as the tools. These choices directly impact the longevity and look of your porcelain tile installation.
-
Adhesive: Use a high-quality, polymer-modified thin-set mortar designed for porcelain. This provides superior bonding and flexibility. Many options are available from UK tile suppliers. You might be interested in: How to master porcelain tile selection
-
Underlayment: The right underlayment creates a stable, level base for your tiles. Your choice depends on the existing subfloor. Cement backer board is often recommended for concrete, while wooden subfloors might need plywood and a waterproof membrane.
The UK tiling market relies significantly on imports, estimated at 75-80% for floor and wall tiles. This highlights the importance of international suppliers. Learn more about UK tile imports here. While this offers diverse product options, it can also affect logistics and costs. Careful planning and material estimation are essential, especially with imported porcelain. Thorough preparation will ensure a successful and stress-free project.
Creating the Perfect Foundation for Lasting Tiles
The secret to a stunning, durable porcelain tile installation lies in the preparation of the subfloor. This is the base upon which your beautiful Hyperion Tiles will sit, and any shortcuts here will compromise the final look. Think of it like constructing a building: a shaky foundation leads to cracks and instability. Similarly, a poorly prepared subfloor will create problems with your tiles.
Assessing Your Subfloor: Knowing What You’re Working With
Before laying a single tile, carefully assess your existing subfloor. Different subfloor types require specific preparation methods. In the UK, common subfloors include concrete slabs (in newer homes) and wooden floorboards (in older properties). Each presents unique challenges.
-
Concrete Subfloors: Look for cracks, unevenness, and dampness. Even small imperfections can become major issues. A slight dip, for example, can create a void under the tile, leading to cracks under pressure.
-
Wooden Subfloors: Check the floorboards' structural integrity. Are they level and stable? Is there any rot or movement? A solid, level base is essential, as wooden subfloors can flex, potentially cracking your porcelain tiles.
Addressing Common Subfloor Issues
After identifying potential problems, address them effectively. This is where professional techniques become essential for proper porcelain tile installation.
-
Uneven Surfaces: Use a self-levelling compound to create a smooth, even surface. This is crucial for large-format tiles, where minor subfloor variations become magnified.
-
Structural Weaknesses: Strengthen wooden subfloors with additional plywood or an uncoupling membrane to prevent movement. This is vital in older UK homes, where floorboards might have weakened over time.
-
Moisture Issues: Address dampness in concrete subfloors with a damp-proof membrane. This is especially important in bathrooms and kitchens. In the UK's damp climate, preventing moisture is key to a successful tile installation.
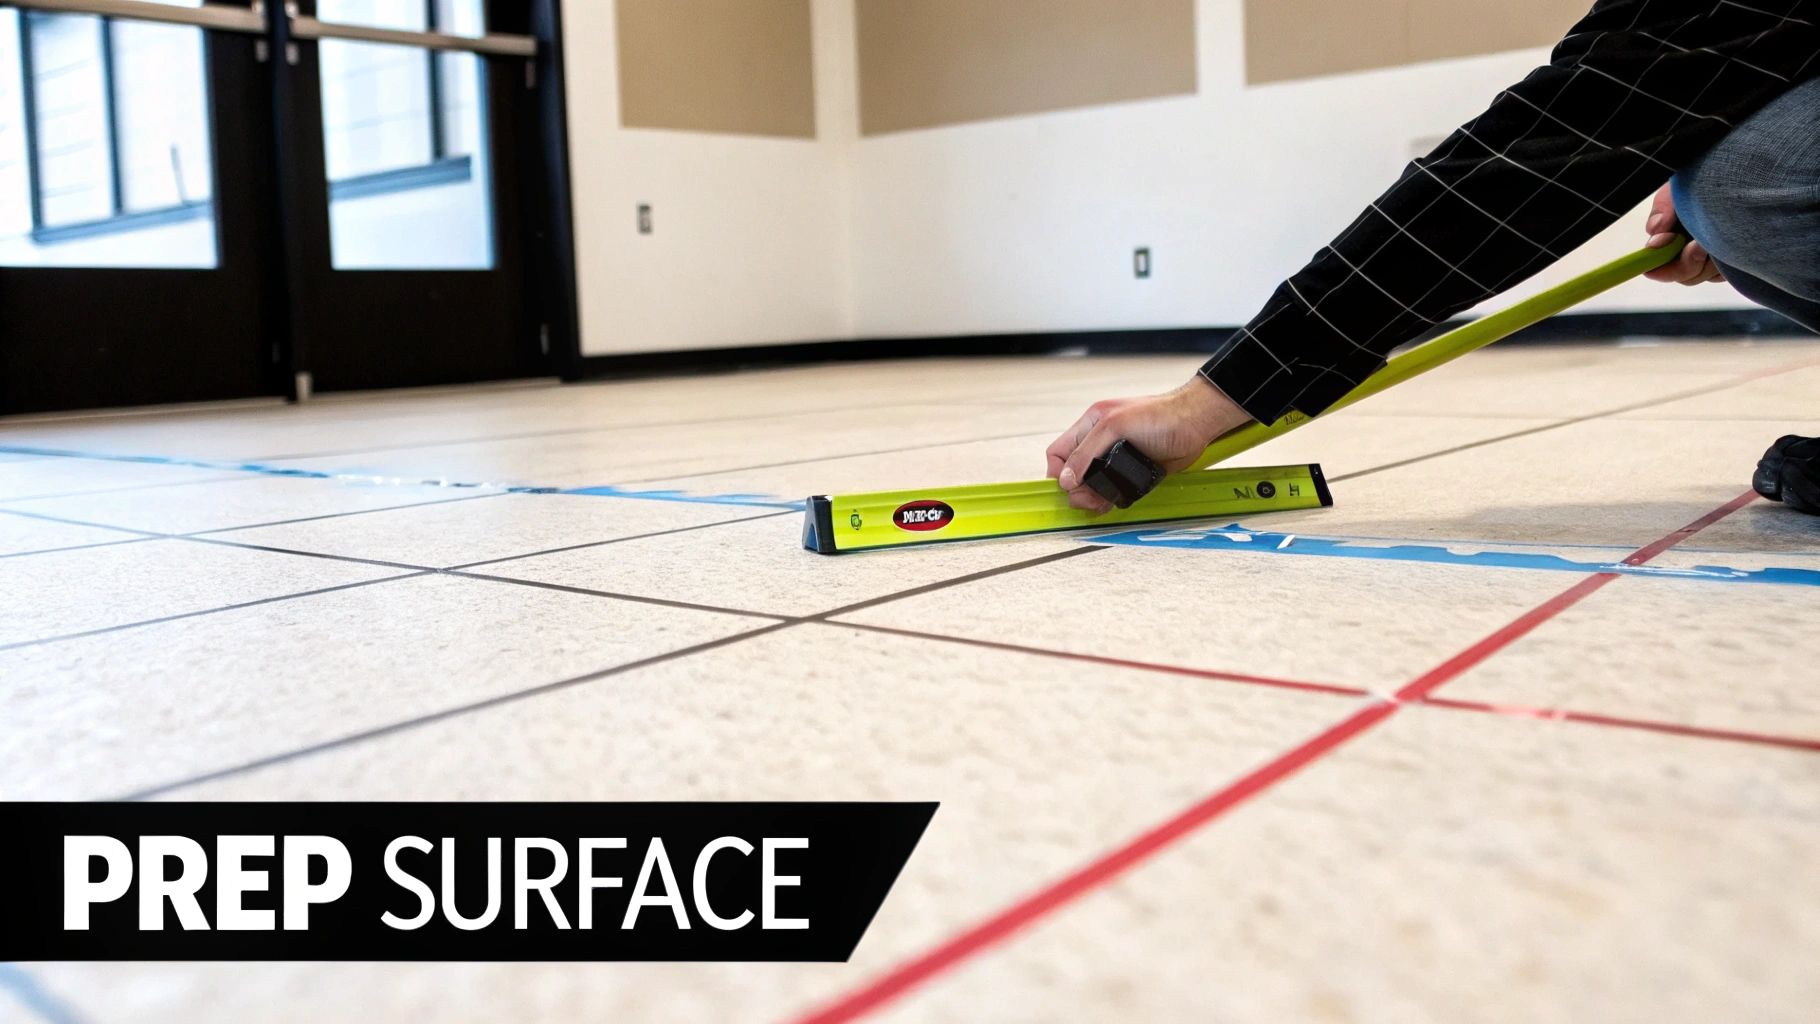
Preparing the Surface for Tiling
Once subfloor issues are resolved, prepare the surface for tiling. This involves accurate reference lines, appropriate underlayments, and waterproofing wet areas.
-
Reference Lines: Use a laser level or chalk line to establish a straight starting line. This keeps your tiles aligned and prevents a skewed installation.
-
Underlayments: Choose the right underlayment for your subfloor. Cement backer board is often recommended for concrete, while wooden subfloors might need plywood and a waterproof membrane.
-
Waterproofing: In wet areas, a waterproof membrane is crucial to prevent water damage. This is particularly important in UK bathrooms, where condensation is common. This extra step protects your investment and prevents future repairs.
The UK construction sector significantly impacts porcelain tile demand. Recent reports indicate slight increases in UK construction output, primarily driven by the commercial and civil engineering sectors. However, the housing sector faces challenges, potentially affecting tile demand. Despite this, porcelain tiles remain a popular choice for UK residential and commercial projects. Explore this topic further. By mastering these fundamental steps, you’ll create a stable, level, and waterproof base for your porcelain tiles, ensuring a successful and long-lasting installation.
Mastering the Porcelain Tile Installation Process
Now that we've covered the essential preparations, let's dive into the actual porcelain tile installation process. This stage requires precision and attention to detail, transforming your groundwork into a stunning tiled surface. This section offers a practical, step-by-step guide.
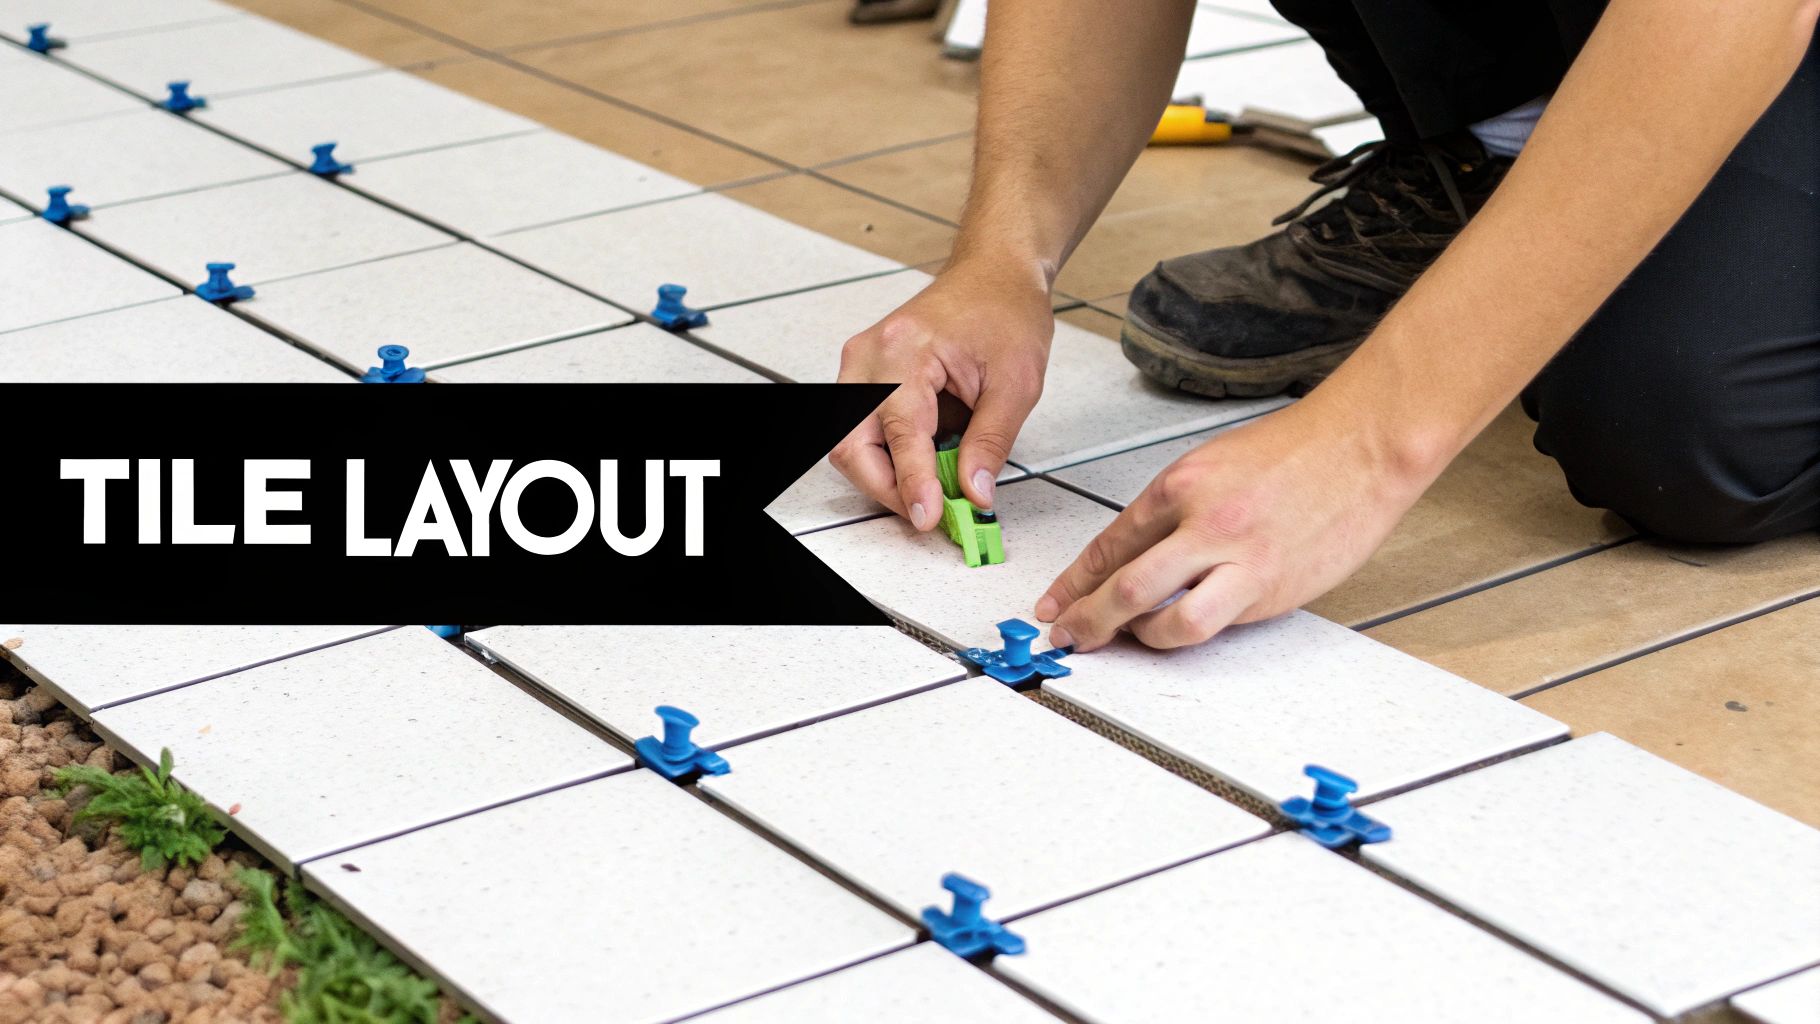
Planning Your Layout: A Strategic Approach
Before you even think about adhesive, plan your tile layout carefully. This crucial step minimizes awkward cuts and ensures a visually appealing final result. Start by identifying your starting point. A prominent wall or focal point works well, working outwards from there.
For instance, in a bathroom, begin at the shower wall and work towards the door. This creates a balanced, professional look. Dry-laying your tiles beforehand lets you visualize the arrangement and spot potential challenges, especially with larger format tiles. Check out our guide on How to Master Porcelain Tile Selection. This preemptive planning can save you from uneven cuts or awkward slivers at the edges.
Applying Adhesive: The Key to a Strong Bond
Next up: mixing and applying the adhesive. Use a high-quality polymer-modified thin-set mortar designed for porcelain. This ensures the strongest bond for these dense tiles. The consistency should resemble peanut butter – not too runny, not too thick. This allows for proper coverage and a secure bond.
Choosing the right notched trowel size is also critical. The notch size depends on the tile dimensions. Larger tiles typically require larger notches for adequate coverage. Interestingly, the UK tile market has seen some fluctuations. While the market (including ceramic and porcelain) dipped by 9% to £463 million in 2020 from £507 million in 2019, it rebounded to £500 million in 2021, an 8% increase. Find more detailed statistics here. This suggests growing popularity for porcelain tiles within the market.
Setting the Tiles: Precision and Patience
With the adhesive spread, carefully set each tile. Press firmly and twist slightly to ensure a strong bond. Tile spacers are essential for consistent grout lines. Aim for approximately 3mm spacing for wall tiles and 5mm for floor tiles in standard installations. This allows the grout to settle properly, creating a durable and beautiful finish.
For large-format tiles (60x60cm and above), a two-person approach is recommended. This prevents breakage and ensures accurate placement, avoiding costly replacements and achieving a smooth surface.
Checking for Lippage: Ensuring a Level Surface
Lippage, or uneven tile edges, is a common issue. Regularly check for lippage with a level during installation. Adjust tiles while the adhesive is still wet to maintain a flat, even surface and prevent tripping hazards. Even small variations can be noticeable with larger format tiles, so attention to detail is key for a professional finish.
Making Cuts and Maintaining Spacing: Professional Techniques
Precise cuts around obstacles require a wet saw with a diamond blade. This specialized tool delivers clean cuts and prevents chipping, especially important with porcelain. Consistent spacing throughout the installation is crucial for professional-looking grout lines, enhancing the overall aesthetic of your project. With these techniques, you’re on your way to a flawless porcelain tile installation.
Beyond Installation: Perfect Grouting and Finishing
The difference between a DIY tile installation and a professional job often comes down to the grouting and finishing. These final steps transform a functional porcelain tile project into something truly fabulous. Let's explore how the right techniques can elevate your hard work, creating a surface that's both beautiful and long-lasting.
Selecting the Right Grout
Choosing the correct grout is crucial. It's the supporting cast to your starring porcelain tiles, and it should complement, not clash. Here are some key factors to keep in mind:
-
Colour: A grout colour can blend seamlessly with your tiles for a uniform appearance, or create a contrasting accent. For instance, light grey grout with dark porcelain tiles delivers a modern, eye-catching look.
-
Type: Different grout types have unique properties. Epoxy grout offers excellent stain and water resistance, making it perfect for wet areas like bathrooms. Cement-based grout, a cost-effective option for many applications, will benefit from sealing for added protection.
-
Width: Grout line width influences both the overall aesthetic and the maintenance. Narrower lines create a sleek, modern feel, but demand more precision during installation. Wider lines offer a more traditional look.
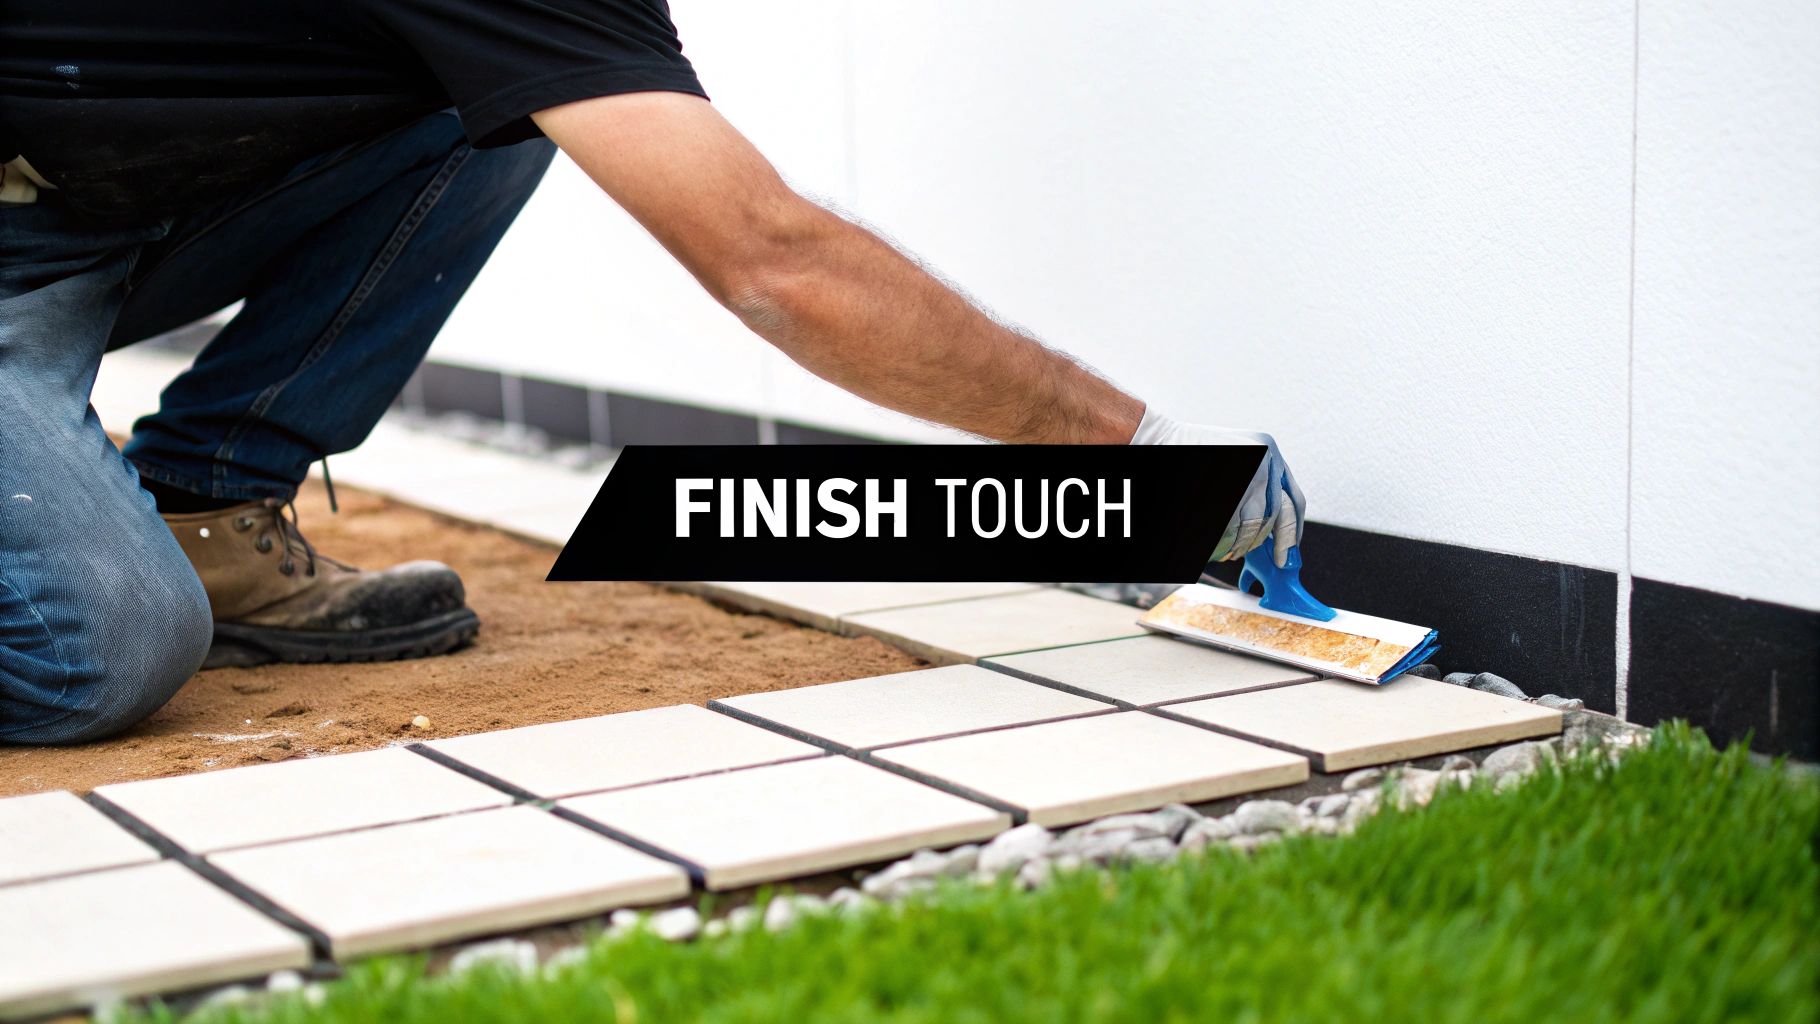
Mixing and Applying Grout Like a Pro
Professional grouting results require the correct mixing and application techniques. Follow the manufacturer's instructions precisely for the best consistency, like following a baking recipe. Aim for a smooth, lump-free paste.
Apply the grout using a grout float held at a 45-degree angle. This ensures the joints are completely filled and prevents voids where moisture and bacteria can thrive. Work in small, manageable sections to prevent the grout from drying prematurely.
Sealing for Lasting Protection
Sealing your grout is a vital step, especially in damp climates. A sealant creates a protective barrier against stains, water damage, and mould growth. Consider sealing both the grout and the porcelain tiles themselves, especially in high-traffic or spill-prone areas.
Penetrating sealers absorb into the material for invisible protection. Surface sealers form a protective layer on top. The best choice for you depends on the specific tile type and the finish you want.
Finishing Touches: Trim, Silicone, and Cleanup
The final details truly elevate your tile installation. Trim pieces create a polished, professional edge. Use silicone sealant at expansion joints and where tiles meet other surfaces like sinks or bathtubs. This flexible sealant allows for movement and prevents cracking.
New construction accounts for over 80% of the ceramic tile market, with porcelain tiles gaining significant popularity. Proper installation is therefore essential in these projects. Discover more insights about UK tile industry trends here. The UK ceramic tile industry is largely concentrated regionally, particularly in areas like Stoke-on-Trent and Newcastle-under-Lyme.
Finally, a thorough cleanup is essential to remove any grout haze and residue. This will reveal the beauty of your newly installed porcelain tiles and showcase your hard work. Mastering these grouting and finishing techniques ensures a beautiful, durable tile installation you can enjoy for years to come.
Solutions to Common Porcelain Tile Installation Challenges
Even with meticulous planning, challenges can arise during porcelain tile installation. Recognising these problems early and implementing effective solutions is key to a successful project and a professional-looking finish. This guide will equip you with the knowledge to tackle common issues.
Lippage: Achieving a Seamless Surface
Lippage, the difference in height between adjacent tiles, is a common issue. A slightly raised tile edge can be a tripping hazard and is especially noticeable with the larger format tiles often found in modern UK homes.
-
Causes: Common causes include an uneven subfloor, inconsistent adhesive application, or variations in tile thickness.
-
Solutions: If the adhesive is still wet, gently tap down the raised tile with a rubber mallet. For severe lippage, you might need to remove the tile, adjust the adhesive, and reset. A tile leveling system can prevent lippage from the start.
-
Prevention: Ensure a perfectly flat substrate. Use a self-levelling compound if necessary. Apply a high-quality adhesive evenly with the correct notched trowel.
Hollow Sounds: Ensuring a Solid Installation
A hollow sound when tapping on a tile indicates a void underneath. This weakens the installation and makes the tile susceptible to cracking.
-
Causes: Insufficient adhesive, debris on the subfloor, or an uneven substrate are the usual suspects.
-
Solutions: If detected early, inject a thin-set adhesive under the tile to fill the void. For widespread issues, removing and reinstalling the affected tiles is the best solution.
-
Prevention: Thoroughly clean the subfloor. Ensure a level surface. Apply adhesive consistently using the correct notched trowel for your tile size. For more information on subfloor preparation, see this helpful guide: How to master the art of preparing your subfloor.
Batch Variation: Maintaining Design Consistency
Even within the same batch, porcelain tiles can sometimes exhibit slight variations in colour or shade. While subtle individually, these differences become noticeable when tiles are laid side by side, disrupting the intended aesthetic. This is particularly true with larger tile formats.
-
Causes: These variations are typically due to manufacturing inconsistencies.
-
Solutions: Before installation, carefully examine tiles from different boxes and blend them to distribute variations evenly across the floor or wall. A “mock layout” can help visualise the final look.
-
Prevention: Order 10-15% more tiles than needed to account for variations and cutting waste, a common practice in UK tile installations. This allows for better blending and prevents project delays.
Adhesive Bleeding Through Grout: Maintaining Clean Lines
Adhesive seeping through grout lines creates an unprofessional appearance and can discolour the grout.
-
Causes: Using excessive adhesive, porous grout, or improper grouting techniques can lead to this issue.
-
Solutions: Carefully remove excess adhesive with a grout removal tool before it dries.
-
Prevention: Use the correct amount of adhesive. Select a dense, non-porous grout. Avoid overfilling grout joints.
Chipping During Cutting: Achieving Clean Cuts
Porcelain's hardness makes it prone to chipping during cutting, especially with intricate shapes.
-
Causes: Using incorrect cutting tools or techniques is the primary cause.
-
Solutions: Use a high-quality wet saw with a diamond blade for complex cuts. A score-and-snap tile cutter works well for straight cuts.
-
Prevention: Practice on spare tiles to perfect your cutting technique. Score the tile firmly and evenly in a single, continuous motion.
To help troubleshoot these and other potential issues, refer to the table below:
Common Porcelain Tile Installation Issues and Solutions: A troubleshooting guide for identifying and resolving typical problems encountered during porcelain tile installation.
| Problem | Possible Causes | Solutions | Prevention Tips |
|---|---|---|---|
| Lippage | Uneven subfloor, inconsistent adhesive, varying tile thickness | Tap down high tiles with a rubber mallet while adhesive is wet; remove and reset for severe cases; use a tile leveling system | Ensure a level subfloor; apply adhesive evenly; use a tile leveling system |
| Hollow Sounds | Insufficient adhesive, debris on subfloor, uneven substrate | Inject thin-set adhesive under the tile; remove and reinstall if widespread | Clean subfloor thoroughly; ensure a level surface; apply sufficient adhesive |
| Batch Variation | Manufacturing inconsistencies | Blend tiles from different boxes; create a mock layout | Order 10-15% extra tiles |
| Adhesive Bleeding Through Grout | Excessive adhesive, porous grout, improper grouting | Remove excess adhesive with a grout removal tool before it dries | Use correct amount of adhesive; select dense grout; avoid overfilling joints |
| Chipping During Cutting | Incorrect tools or techniques | Use a wet saw for complex cuts; use a score-and-snap cutter for straight cuts | Practice on spare tiles; score firmly and evenly |
This table provides a quick reference for diagnosing and addressing common tile installation problems, highlighting the importance of preventative measures.
Ready to transform your home with beautiful porcelain tiles? Explore the selection at Hyperion Tiles and create the space of your dreams.
Share:
Mosaic Tile Maintenance: Keeping Your Design Gleaming
How to Clean Grout: Expert Tips for Sparkling Tiles